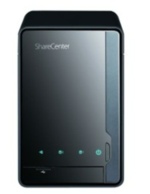

I found it incredibly difficult to find information about getting my iPad to store files directly on my DNS-320 NAS. The instructions for the device don’t cover WebDav and only seemed to manage to get something in German – which my GCSE let me down on…
After much playing around I found out that to get this going you will need to do the following:
- Upgrade to latest firmware
- Modify a network share so that WebDav is enabled
- Make sure you user account has WebDav enabled
- Connect using the URL http://DNS-320IP/webdav/ShareName – replace DNS-320IP with the IP you have it set up on and ShareName with the network share you have previously modified (btw it’s case sensitive)
Happy WebDav-ing
For a step by step tutorial go to: https://www.head4space.com/2012/07/step-by-step-tutorial-for-setting-up-webdav-on-dlink-dns-320/
2 Responses
Hi, I’m trying to get webdav working on my dns320L but even by following the tutorial step by step, the nas doesn’t activate the webdav, it stays like if I didn’t check it.
Thank you for posting this!! Once I changed the case on the share name, it worked perfectly.